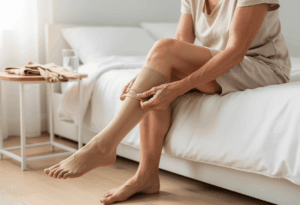
Putting on compression stockings correctly matters more than most people think. The right technique improves comfort, ensures the intended compression level, and reduces the risk of skin irritation or uneven pressure.
In simple terms: the best time to put on compression stockings is in the morning, before swelling develops, using slow, controlled movements and avoiding pulling from the top.
Many people struggle at first, especially if they deal with edema, reduced mobility, or post-surgical stiffness. This guide explains how to do it safely, step by step, while adapting the technique to common situations.
Key takeaways:
- Put compression stockings on in the morning, before leg swelling increases.
- Always roll the stocking inside out first—never pull from the top.
- Correct positioning prevents discomfort and loss of compression.
Compression stockings are designed to apply graduated pressure, meaning compression is strongest at the ankle and gradually decreases upward. If they are twisted, stretched unevenly, or rushed on, this pressure gradient is compromised.
Why proper technique matters
Wearing compression stockings incorrectly can reduce their effectiveness and, in some cases, cause problems. When stockings are pulled forcefully or bunched up, they may create pressure points, restrict circulation, or slide down during the day.
Proper technique helps to:
- Maintain consistent compression
- Improve daily comfort
- Protect fragile or sensitive skin
- Extend the lifespan of the stockings
This is especially important for people with chronic venous insufficiency, post-operative swelling, or limited hand strength.
Preparing before putting on compression stockings
Before you start, preparation makes a noticeable difference.
Check your legs and skin
Make sure your skin is clean and dry. Moisturizer residue can make stockings harder to slide on. If you use cream, apply it the night before rather than just before dressing.
Also check for:
- Cuts or irritated skin
- Sharp toenails
- Jewelry that could snag the fabric
Sit in a stable position
Sit on a chair or bed with good back support. Avoid standing while putting stockings on, especially if balance or strength is an issue.
Basic step-by-step method
This standard method works for most knee-high and thigh-high stockings.
Step 1: Turn the stocking inside out
Reach inside the stocking and turn it inside out up to the heel, leaving the foot portion intact. This reduces friction and gives you better control.
Step 2: Position the foot correctly
Place your foot into the stocking, making sure the heel is aligned with the heel pocket. This step is essential for comfort and correct compression distribution.
Step 3: Gently unroll upward
Slowly unroll the stocking up the leg using your palms not your fingernails. Do not yank or pull from the top band.
Step 4: Smooth wrinkles
Once the stocking is in place, gently smooth out any wrinkles by sliding your hands upward along the leg.
A properly fitted stocking should feel supportive but not painful.
Common early mistakes to avoid
Many first-time users make the same errors:
- Pulling the stocking straight up without turning it inside out
- Twisting the fabric around the calf or thigh
- Letting the top band roll or fold
These mistakes can reduce effectiveness and cause discomfort later in the day.
How to put on thigh high compression stockings correctly
Putting on thigh high compression stockings follows the same principles as knee-highs, but positioning is even more important to avoid slipping or discomfort.
Key positioning rules
- Always start in the morning, before swelling increases
- Sit down and keep the leg slightly bent
- Make sure the top band sits flat, never rolled
Step-by-step method
- Turn the stocking inside out up to the heel.
- Slide your foot in and align the heel carefully.
- Unroll the stocking slowly up the calf and thigh using your palms.
- Stop a few centimeters below the groin, unless otherwise instructed.
The stocking should feel snug but should not pinch or dig into the skin.
Keeping thigh high stockings from slipping
Slipping is usually caused by incorrect placement rather than poor fit.
To improve hold:
- Smooth the fabric evenly over the thigh
- Avoid lotion on the upper leg just before wearing
- Make sure the silicone band (if present) is clean and dry
Practical tip: If thigh-high stockings slide down, remove them and reapply rather than pulling them higher during the day.
When thigh-high stockings are harder to put on
Thigh-high compression stockings may be more challenging if you have:
- Reduced hand strength
- Edema or leg swelling
- Limited hip or knee mobility
In these cases, assistive techniques and tools can make a big difference.
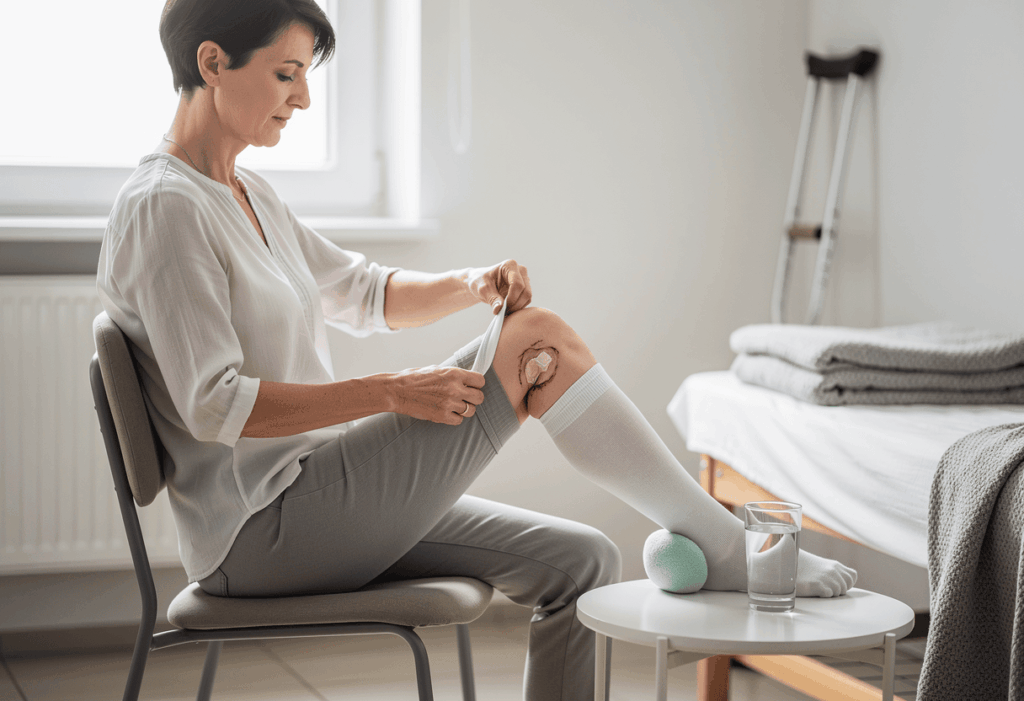
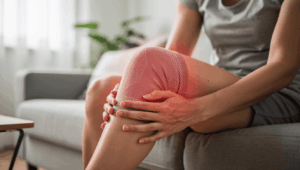
How to put on compression stockings with edema or after knee surgery
When swelling is present, the way you put on compression stockings with edema needs to be gentler and more controlled. The same applies after knee surgery, when flexibility and strength are often limited.
With edema (leg swelling)
Swelling increases resistance, especially around the ankle and calf.
Helpful adjustments:
- Put stockings on first thing in the morning, when edema is lowest
- Elevate the leg for 10–15 minutes before putting them on
- Use slow, rolling motions rather than pulling
If the stocking feels painfully tight, stop and reposition—it should feel supportive, not restrictive.
After knee surgery
After surgery, the knee area is sensitive and stiff.
Best practices:
- Keep the knee slightly bent while applying the stocking
- Smooth fabric upward without forcing it over the joint
- Avoid tugging around the incision area
A poorly positioned stocking can increase discomfort or limit movement.
Important: If pain, numbness, or skin color changes occur, remove the stocking and consult a healthcare professional.
How to put on compression stockings using a plastic bag
The plastic bag method is one of the easiest ways to put on compression stockings when friction is the main issue. It is especially helpful for people with edema, reduced hand strength, or post-surgical stiffness.
Step-by-step plastic bag method
- Place a thin plastic bag over your foot and heel.
- Slide the stocking over the foot until the heel is correctly positioned.
- Gently unroll the stocking up the leg using your palms.
- Carefully pull the plastic bag out through the toe opening.
This technique reduces resistance and prevents excessive pulling on the fabric.
Quick comparison of application methods
| Situation | Recommended method |
| Normal use | Standard roll-and-unroll technique |
| Thigh-high stockings | Slow unrolling with correct top placement |
| Edema or swelling | Morning application + leg elevation |
| After knee surgery | Gentle application with knee slightly bent |
| High friction or weak grip | Plastic bag method |
Final reminders for safe daily use
- Apply compression stockings every morning before swelling increases
- Never fold or roll the top band
- Remove and reapply if discomfort appears
- Consistency matters more than force
Used correctly, compression stockings should feel supportive, stable, and comfortable throughout the day not tight or painful.